Showing posts with label Crafts/Activities. Show all posts

Saturday, January 11, 2014

Minnie Mouse Party & DIY Pinata

Time to break my hiatus from blogging.  Would you believe life has gotten busier with 4 kids?!?  Who would've thought...  I spend so many hours a day toting around a heavier-than-she-looks 5-month-old and anytime my arms are free I find myself frantically catching up on housework or half-asleep on the couch watching reruns of Duck Dynasty...  

But now I'm ready for an update.  And I'm going to rewind a couple of months back to Keziah's 7th birthday party.  Every year the party theme is a subject of great debate.  My daughter has some over-the-top ideas about what she would like and she also has a stubborn streak.  But, if I'm strategic, I can convince her (every once in awhile) to go with one of my ideas.  This year, in light of our upcoming trip to Disney, I convinced her to go with a Minnie Mouse theme, which turned out to be one of our simplest themes yet.  
One nice thing about this theme is that you can find tons of Minnie Mouse birthday paraphernalia in all kinds of stores.  We did buy some Minnie Mouse plates and balloons, but we also did a few crafty things to add our own personal touch.  

We wanted all the party guests to have Minnie Mouse ears for the party so that was our first project.  I traced circles on black cardstock (I think I used a plastic kids cup for this size circle) and drew a tab on one side before cutting it out.  My dollar store glue gun came in very handy and these were done in no time.  I just folded the tabs on the ears and glued them to the underside of the hair band.  I used the ribbon to make small bows and glued them to the top of the headband.  

Minnie Mouse ears complete!


I used more black and pink cardstock to create simple goody bags.


The cupcakes were the easiest ever!  With regular size oreos and mini oreos we were able to create the mouse shape.  Some of the ideas on Pinterest showed the addition of a pink bow using fondant, but that just sounded like waaaay too much work.  I think with the pink icing they looked "feminine" enough to pass for Minnie cupcakes (as opposed to Mickey ones).


One thing that Keziah had her heart set on this year was having a pinata at her party.  I really didn't want to buy one so I decided to see if we could create our own.  It was actually pretty simple and I think it turned out really great!


I started off with some large cereal-type boxes rescued from my recycling bin and traced the mouse shape on them using a large dinner plate for the head and a smaller plate for the ears.


Then I cut strips of cardboard to make my head 3-dimensional and started creating my shape with lots of painters tape.


Half-finished and ready to tape the other side on.


My 3D pinata shape is finished.  I left a flap at the top where I could add the candy in later.

Keziah was pretty pleased with the Minnie Mouse shape and next it was time for the fun part - paper mache!


We made a mixture of some white glue and water to make a sort of runny paste and then dipped in our ripped up newspaper - tons of fun for the whole family :)


After we felt it was sufficiently covered in glue and paper, we left our soggy shape to dry and harden.  If you plan to attempt this, give yourself a few days.  It took a day or so to dry and then I did about 3 coats of black paint (crayola craft paint) to get good coverage - leaving it to dry in between coats.


When it was finished I packed that baby full of leftover Halloween candy.  (Side note: I decided to divvy up the candy into snack-sized ziploc bags - one for each guest - to avoid a crazy free-for-all where some kids might end up with a ton of candy while others got none.)

Lastly I taped the top flap closed with packing tape and added a pink bow, which I made by adapting the instructions I found here.


And after we were finished, it was time to destroy our hard work! Erik drilled a couple of holes in the top and hung the pinata from our plum tree in the backyard.  I wasn't sure how it would stand up to the baseball bat test - I didn't want it to come apart with the first hit but I also didn't want it to be an indestructible fortress either.  In the end it worked out perfectly - each of the kids got a couple good whacks and then we let Keziah go to town on it until it broke open completely.


Overall, pinata-making was a pretty simple process and could work with all kinds of shapes - like a number for the birthday boy/girl's age or the first letter of their name...  I think I may have inadvertently started a new birthday tradition... :)

Thursday, February 07, 2013

Screen-Time Detox

Over the last few months I've become painfully aware that Silas is a full-on screen-time addict.  If it's not a TV show or a movie, he's asking to play on the computer or the Wii.  And when we're out shopping or waiting during ballet practice, all he wants is to play on my iphone...  

I think the problem really escalated in the last months of me feeling exhausted and nauseated 90% of the time.  Silas wakes up at 6 am like clockwork, so I of course turn on the TV, give him his milk and then head back to bed.  And then while the older kids are at school and I'm muddling through my day, I don't have the willpower to turn off the laptop or the TV after he's obviously had enough. 

Now, as soon as the screens are turned off, Silas proclaims that he is B.O.R.E.D!  The kid has forgotten how to play.  So now that I am feeling much improved and more energetic I've decided it's time for some screen-time detox.  

It's not easy, let me tell you.  The boy has a short attention span for anything that does not involve staring at a screen (that he could do for hours, let me tell you!)  This morning we played with play-dough for all of 5 minutes before going on to the next thing - painting.  I really resist taking out the painting stuff since it seems overwhelming for such a short amount of play, but he stuck with it for about 20 minutes and actually enjoyed rinsing out his paint container at the end so it wasn't really that painful.  Then we read our new library books, but that didn't take much time at all.

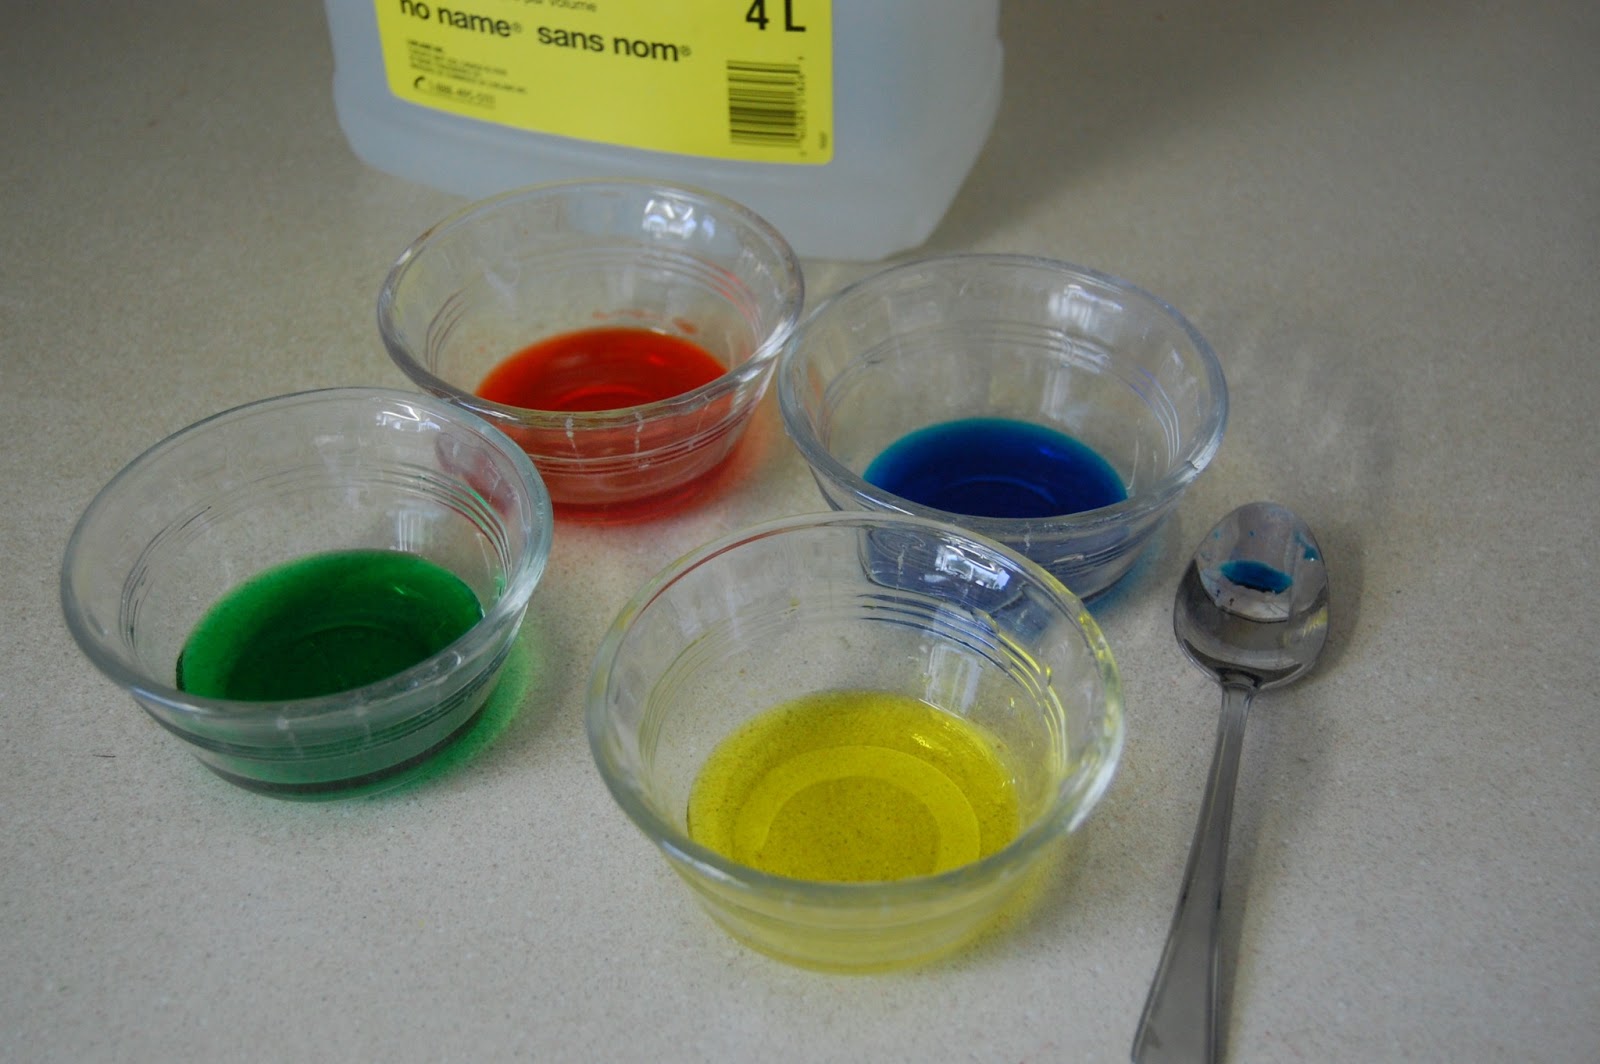
At that point I really had some stuff I wanted to get done and that's where the true test comes because when he is asking for screen-time and I'm really busy, it is just far too tempting to give in.  But today I had resolved to be strong, so I pulled out an idea from my Pinterest board.  All it takes is baking soda, vinegar and food colouring.  It also helps to have a medicine dropper (took me awhile to track one of these down since we haven't administered infant tylenol or vitamin D drops in a couple years!)


Mix the vinegar with different colours...


And give your kid a plate full of baking soda.  After that, they can drop away and create colourful little volcanic eruptions.


Silas loved the sound of the "fizz".


This activity didn't last 2 hours (like it apparently did for the pinner's kid).  Not even 1 hour.  We're talking 20-30 minutes tops.  But hey.  It gave me a chance to make the mango salsa for tonight's delicious dinner recipe so I call that a success.


And to keep things real, I did let Silas watch TV after managing to hold him off for a couple of hours.  But that too, I consider a success.

Baby steps people.  Baby steps.

Tuesday, December 20, 2011

Teacher Gifts

This year I opted to make homemade teacher gifts after finding a recipe for homemade vanilla brown sugar body scrub, which contained 4 simple ingredients.


So after school last week I solicited the help of the kids to make our sugary concoction.


Vanilla Brown Sugar Body Scrub (www.bystephanielynn.com):

2 cups brown sugar
1 cup granulated sugar
1 cup sunflower oil (this oil doesn't have a strong scent like olive oil)
1 tsp pure vanilla extract

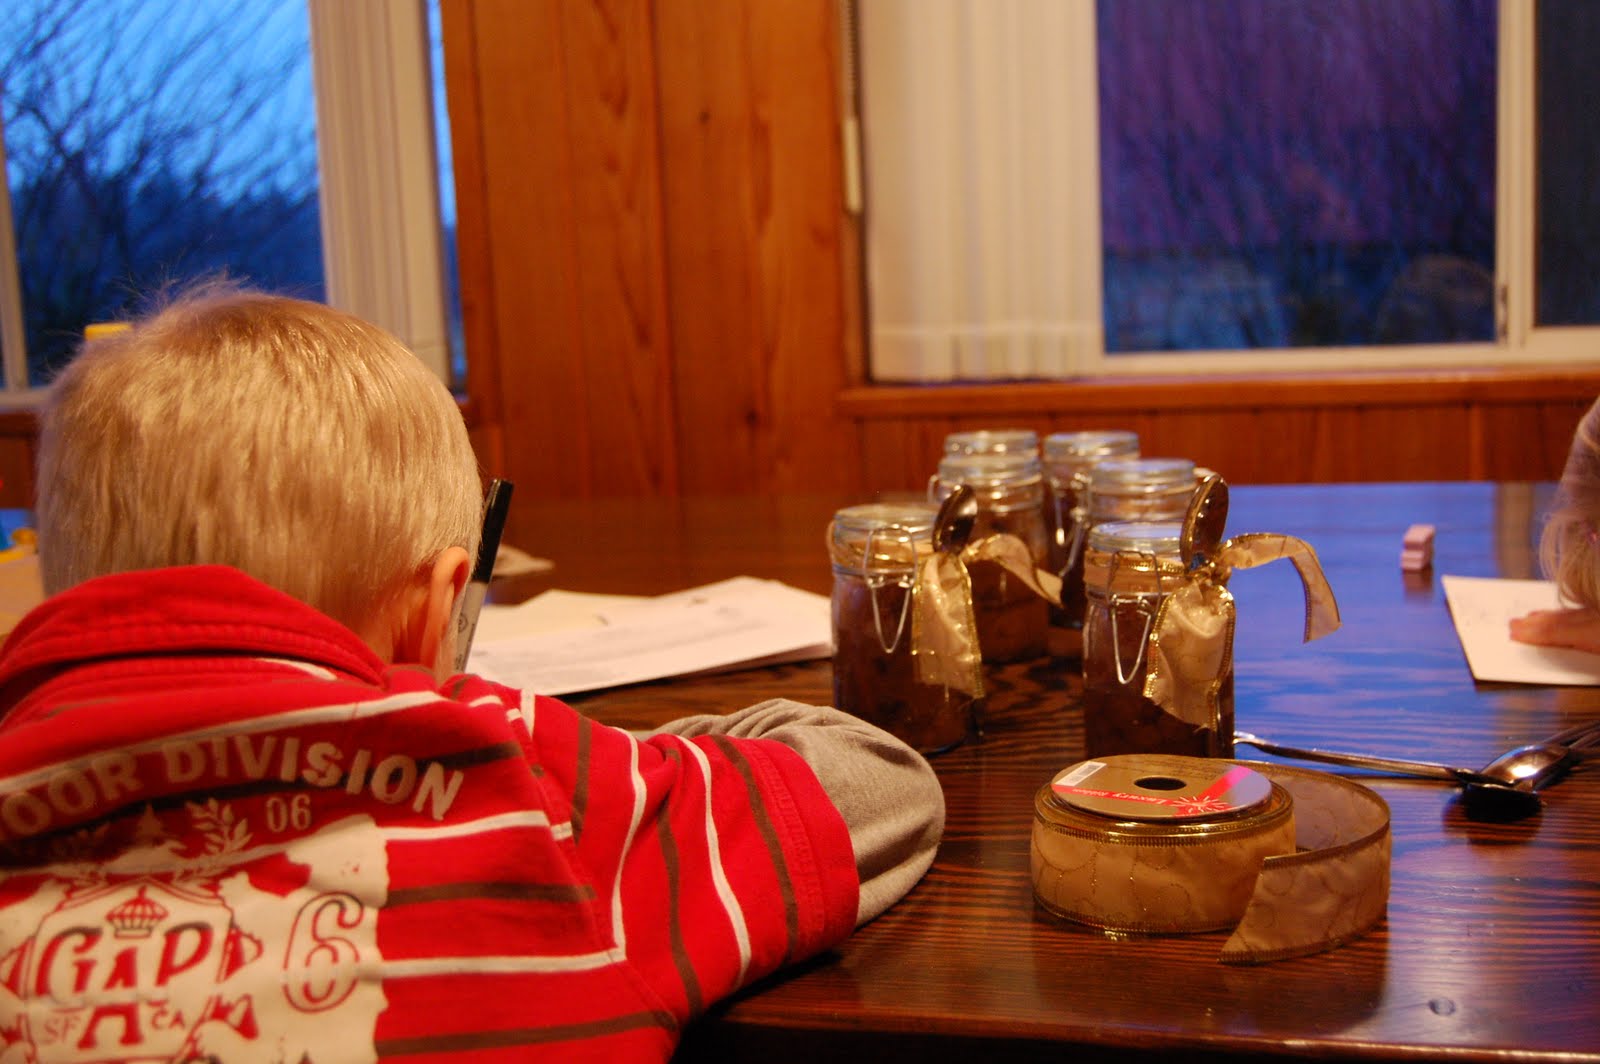
I doubled-and-a-halved this recipe since I had to fill 5 small jars (which I found at the dollar store).


Not only did it smell delicious, it was also quite edible! I had to keep telling the kids to stop eating their teacher's body scrub!


Then it was time to make the Christmas cards...


While the kids worked on that, I created some labels out of cardstock & scrapbooking paper.


I tied on a spoon with some wire ribbon (all from the dollar store) and our teacher gifts were complete!

Thursday, November 24, 2011

Keziah's Rainbow Party


I'm pretty sure Keziah's been planning her 5th birthday party ever since her 4th one was over last year. And she's changed her birthday theme several times over the past 12 months. As November crept nearer, she was really leaning towards a princess fairy theme. But since we've done either princesses or fairies for the last 2 years, I hoped to convince her to change her mind. After she saw a few of the rainbow party ideas I had pinned on Pinterest, she started to see my vision and get excited!

There were so many great ideas, but I decided to pick just a few ones that were do-able. The first being this rainbow pennant banner. I used scrapbook paper that I already had on hand (thanks to the big Costco pack of paper I bought several years ago) and used this free printable template to trace them. I bought some ribbon at the dollar store and then stapled the paper on in a rainbow pattern. Very easy and super cute. I think I'll hang it in the kids' room now that the birthday party is over.


With the extra paper from the pennant banner, I had an idea for the invitations. (This was an idea I came up with on my own - no Pinterest needed, thank you very much!)


I cut up the coloured paper into strips and glued them onto a piece of folded card stock. Then I free-handed a cloud shape on a piece of white card stock, glued it on the paper and cut any overhanging edges. It was a bit time-consuming since I had to make about 10 for all the little girls Keziah had on her list of party guests.


But I think they turned out pretty cute! I purposely didn't worry about cutting the strips all the same width or lining them up evenly (which was also nice since Keziah wanted to help with the gluing and she didn't have to be too careful). I think it turned out better that they were intentionally a bit crooked.


I also let Keziah address all the envelopes. I suggested writing all the names in rainbow colours and Keziah decided to draw a rainbow on each one.


I found a really cute idea from here for rainbow cupcakes. I made the cupcakes (using rainbow bit cake mix of course!) a few days ahead of time and then froze them. On party day, I died my white icing sky blue, warmed it up a bit in the microwave and let the kids help me with the cupcake dipping. This technique is SO easy that they were able to do all my cupcakes and they all turned out great!


Then came the decorations. I found these sour rainbow belts at my new favourite Dollarama in Aldergrove. I decided to try to make the clouds out of marshmallow cream because it seemed like it would make the clouds extra fluffy and creamy. But it turns out that marshmallow cream = a BAD idea. I should've just stuck with white icing (and I would've had plenty leftover from the icing that I already had, except that I had died it all blue), but you live and you learn, right?


After making a few cupcakes I quickly realized 2 things.
1. Marshmallow cream is really sticky. And I had about 5 different spoons and knives going to try to get the goopy stuff where I wanted it on the cupcake.
2. My rainbow belts were too long. I ended up cutting about an inch off of each one so they wouldn't droop. (But that was OK, because the kids and I were happy to eat those extra inches :)

The finished product:


Another downside to the marshmallow cream was that by the time we got around to actually eating the cupcakes, it had all sort of melted down the sides. Of course the kids didn't notice one bit - and I was just happy I'd thought to take some pictures before they got all melty and drippy.


Rainbow goody bags.


Party snacks.


Another idea I found was a rainbow drink. The week before the party, I made different colours of ice cubes from Kool-aid packs (omitting the sugar that it calls for).


Then you just serve them in a clear cup with clear pop and let the ice cubes melt and make the drink all rainbow-y. It's also nicer than just food-colouring because each ice cube had a different flavour as well.


I also decided to make rainbow fruit skewers. The kids LOVED these. I forgot to take a picture of the ones that I made. (Honestly, they got gobbled up so fast I didn't really have a chance!) But this was my inspiration picture (from here).


Erik totally thinks I went overboard with the party. Like, how much do 5 -year-olds really care about whether their drink and their fruit and their invitation look like a rainbow?
I know, I know.
But I just couldn't really help myself :)

Thursday, November 04, 2010

Arts & Crafts

One of Micah & Keziah's new favourite TV shows is Artzooka on Kids CBC - a show with all sorts of craft and other fun art ideas. And if you've got Treehouse, you've probably seen the crafty show, Mister Maker. (We don't get Treehouse - but we recently discovered we can watch any Treehouse shows for free with Shaw on Demand. You know, because we didn't have enough TV & videos to choose from, I guess. And I was really missing Diego & Dora & Bob & Max & Ruby... ;)

Of course, the downfall to these crafty shows is that Micah thinks we can make all of these crafts, like, NOW. At 7 in the morning. On a school day.

There are some good, do-able ideas and we found one the other day. All we needed was water, food colouring and paper towels. (And newspaper and smocks for the inevitable mess). It was a very easy craft with cool results.

I only had red and green food colouring when we did this... Until I combined red and green to make a third colour that started off as an unappealing brown. A few extra drops of red and I had upgraded to a dark burgundy :)


Fold your paper towel in half, and in half again, and then in a triangle, and in another triangle (did you follow that??)


Dip each of the 3 corners in different colours.


Unfold...


... and voila!


The kids had the idea to let them dry and use them for holiday napkins :)

The only downfall to this craft? It's over WAY too fast. Make sure you have lots of paper towel ready to be folded and dyed, and lots of places to lay them to dry!